We use cookies to give you a better shopping experience. By using this website or closing this message you agree to our use of cookies. Learn More
Allow Cookies
 Imprint Plus Canada
How To Use Design Studio
Welcome to Design Studio Guide!
This guide will walk you through how to design and print your custom name badges using our online Design Studio.
The Design Studio is a web-based tool that lets you personalize badge layouts, upload logos, add names and titles, and get a preview of how everything will look before you place your order.
Whether you’re designing just one or prepping for a whole team, this step-by-step guide will help you build exactly what you need.
STEP 1: Pick Your Product
Start by choosing the product size and plate color you'd like to order.
What to do:
1. Use the dropdown menu to pick the product size you want.
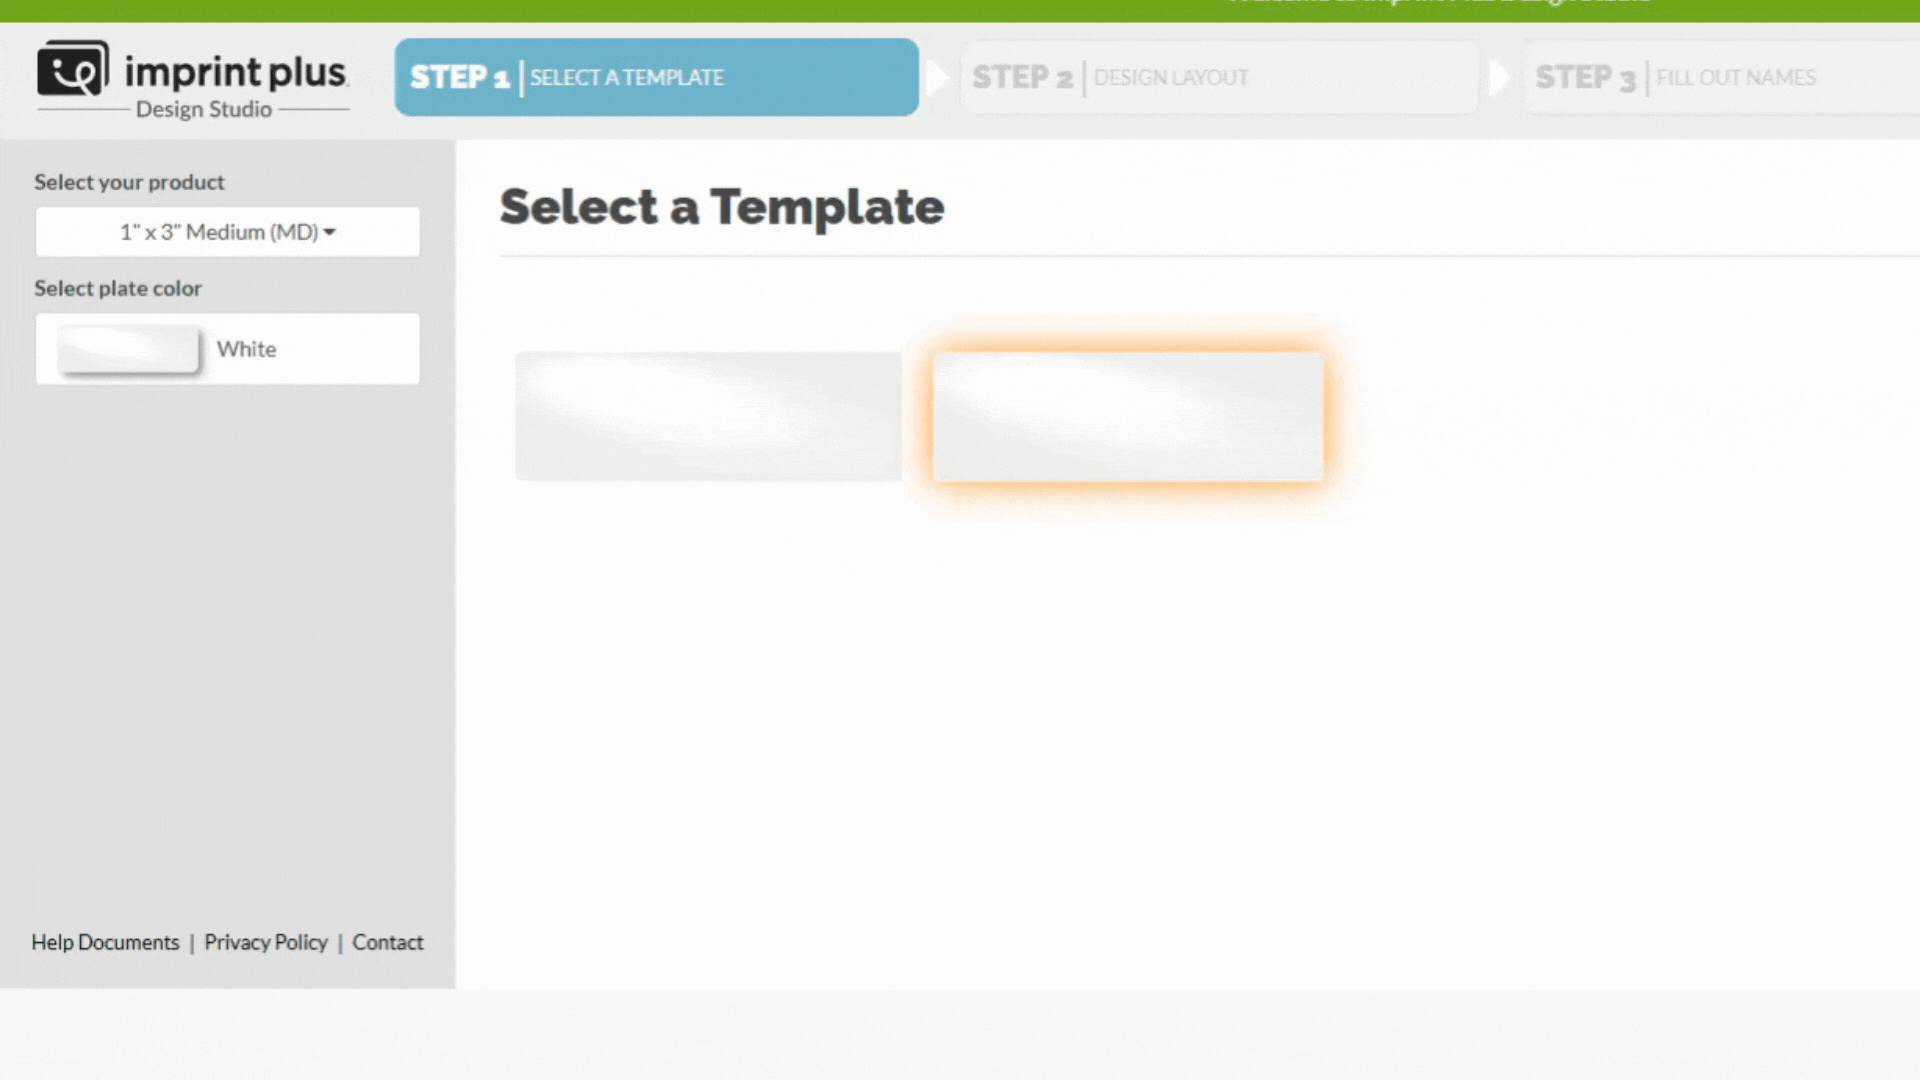
2. Choose a plate color. This is just for preview purposes and won’t show up when you print.
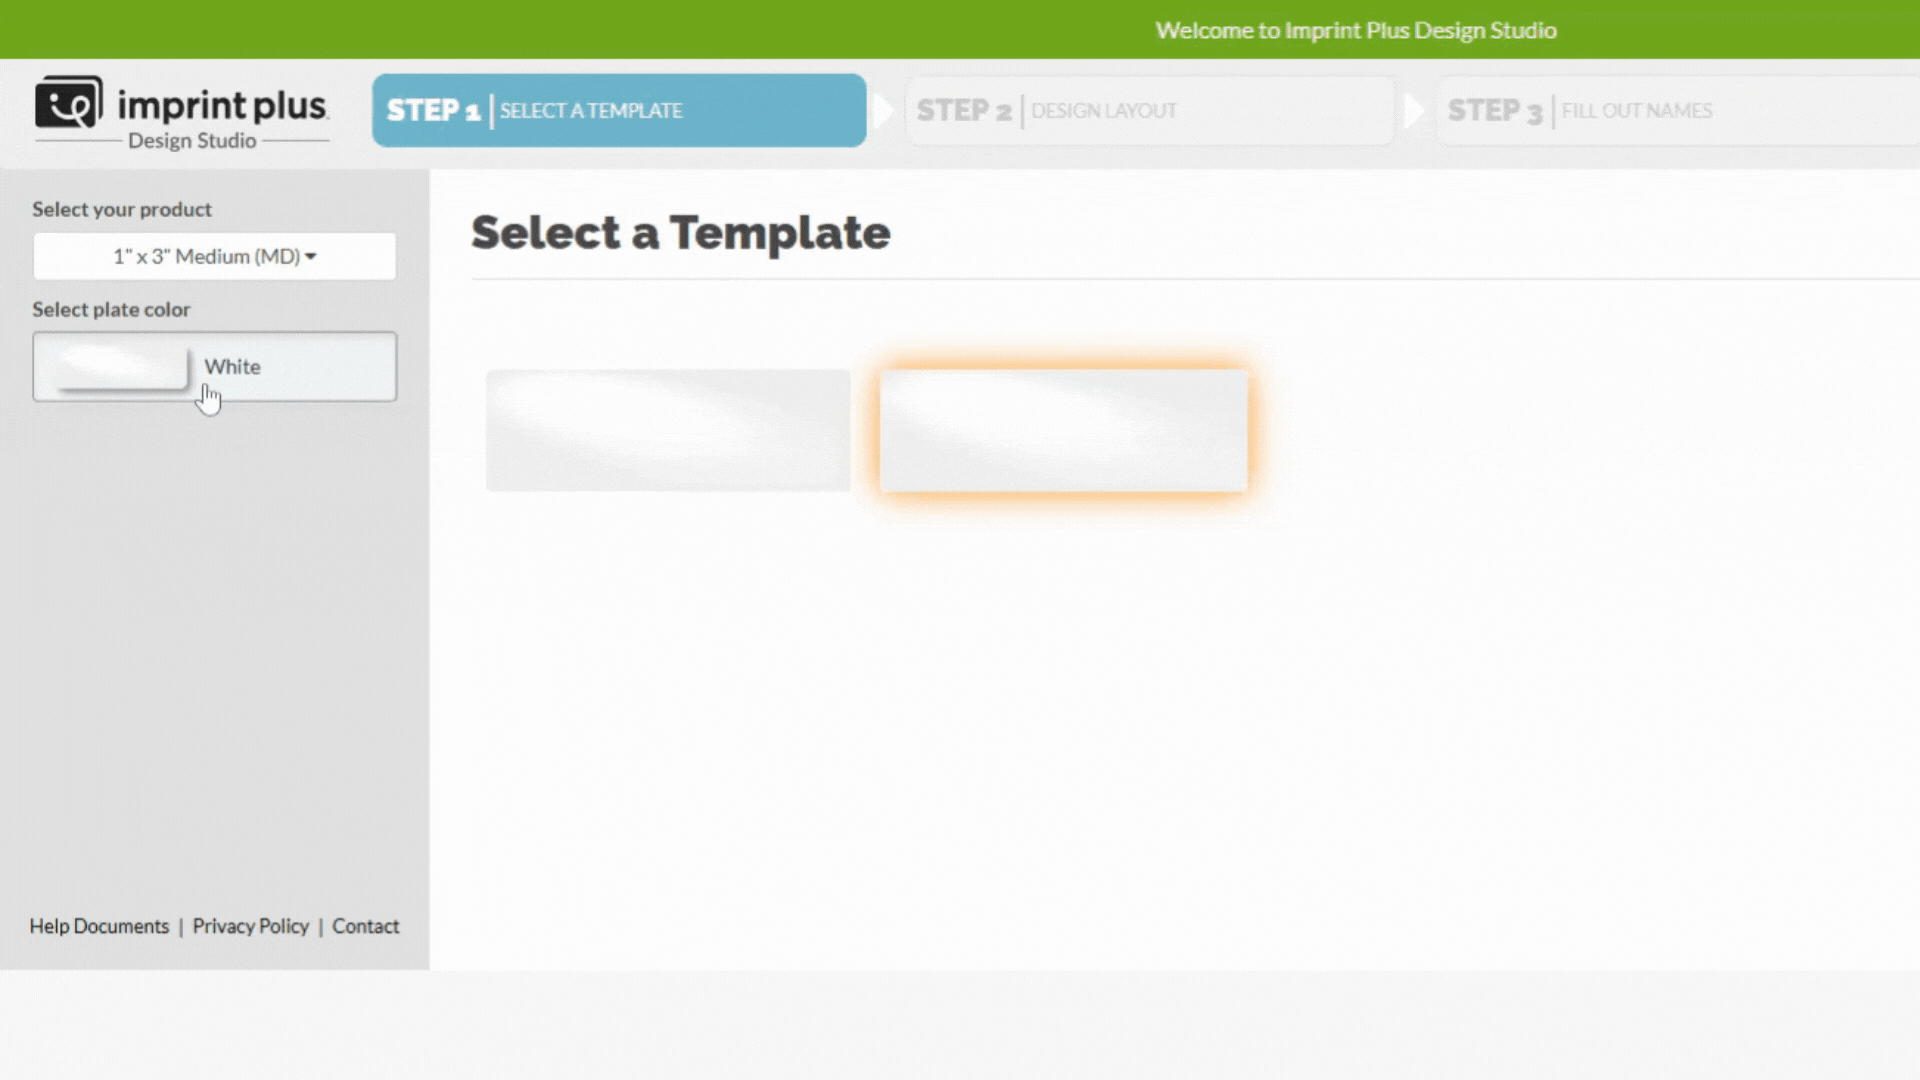
3. Click "Select this Design" to continue

Heads up: The system won’t save your design if you leave the page, so make sure you finish everything before closing or refreshing.
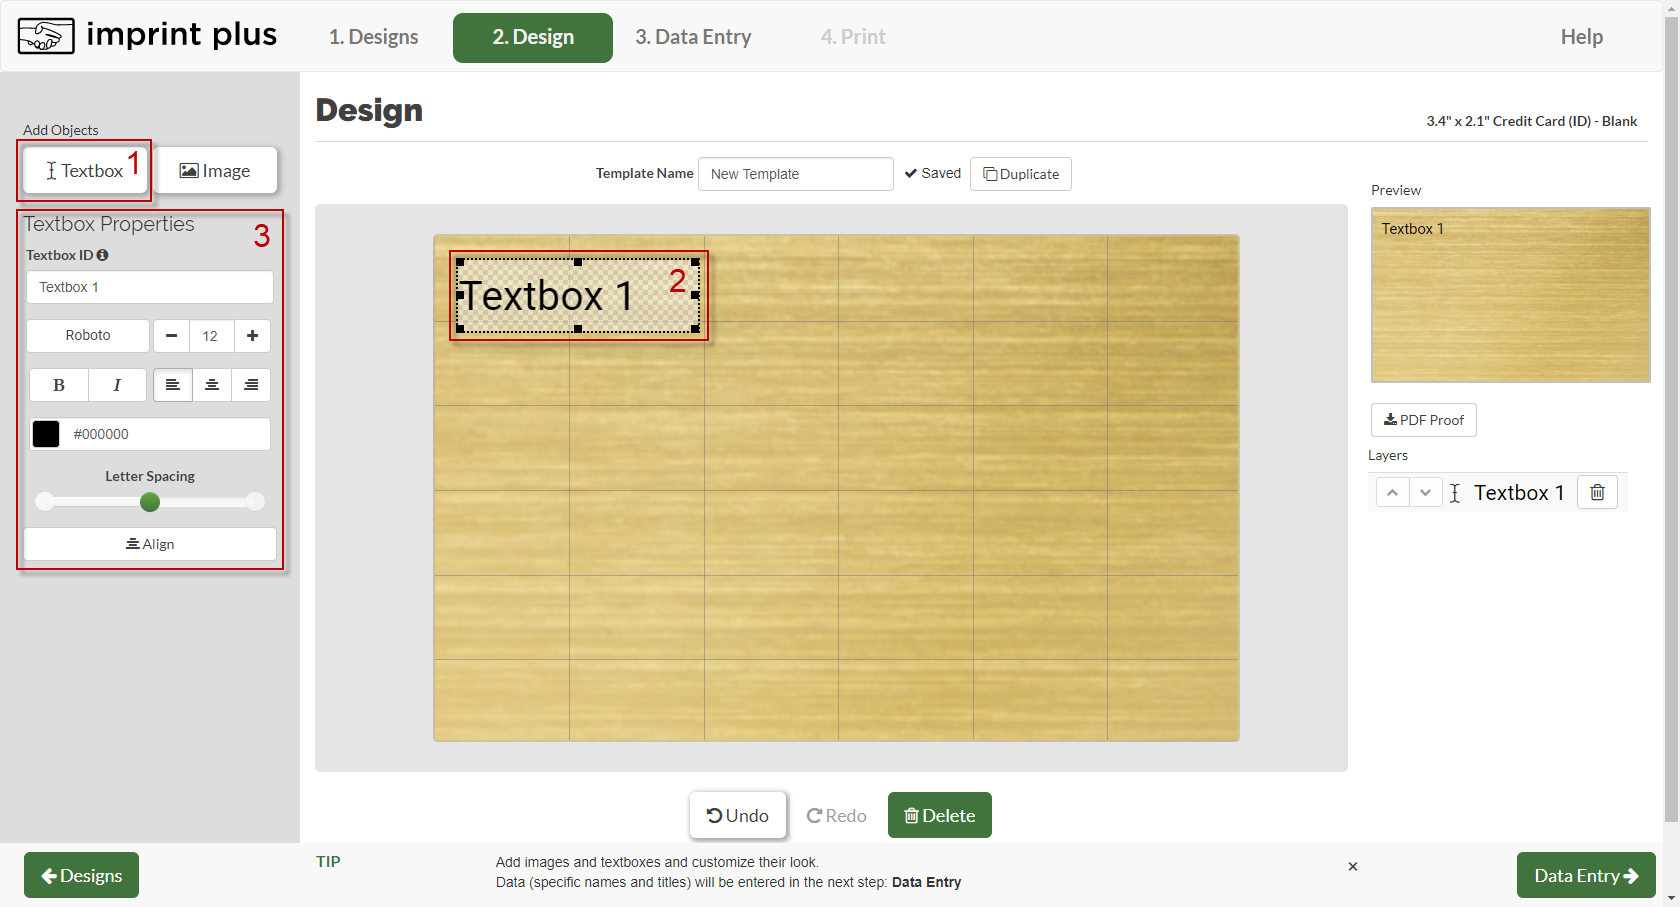
STEP 2: Build Your Layout
This is where you set up the layout like where your text or logo will go. Do note that you’re not typing in the actual names yet. That happens in the next step.
Add stuff like this:
1. Click Textbox to add a text area for names or titles.
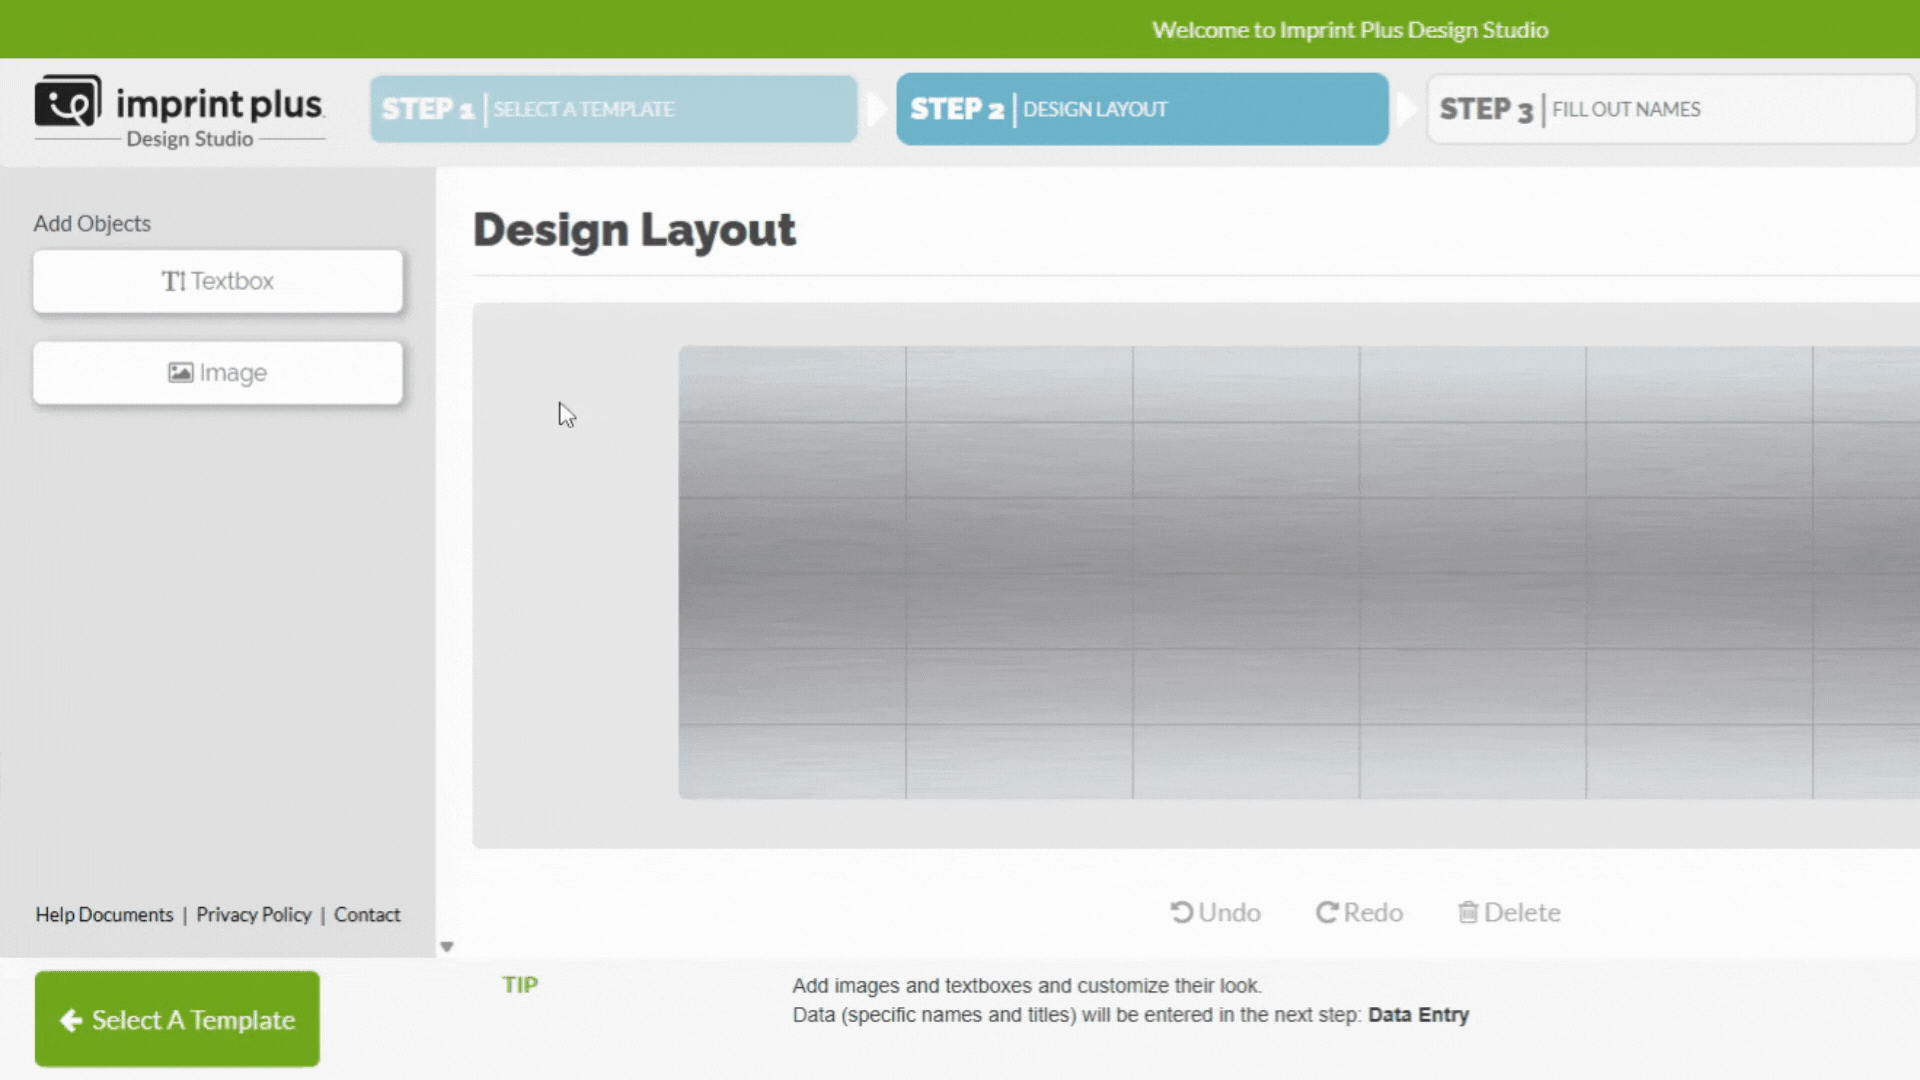
2. Click Image to upload a logo or graphic from your device.
3. Use the preview panel to see and manage your layers.
4. Switch the grid on or off to help with alignment.
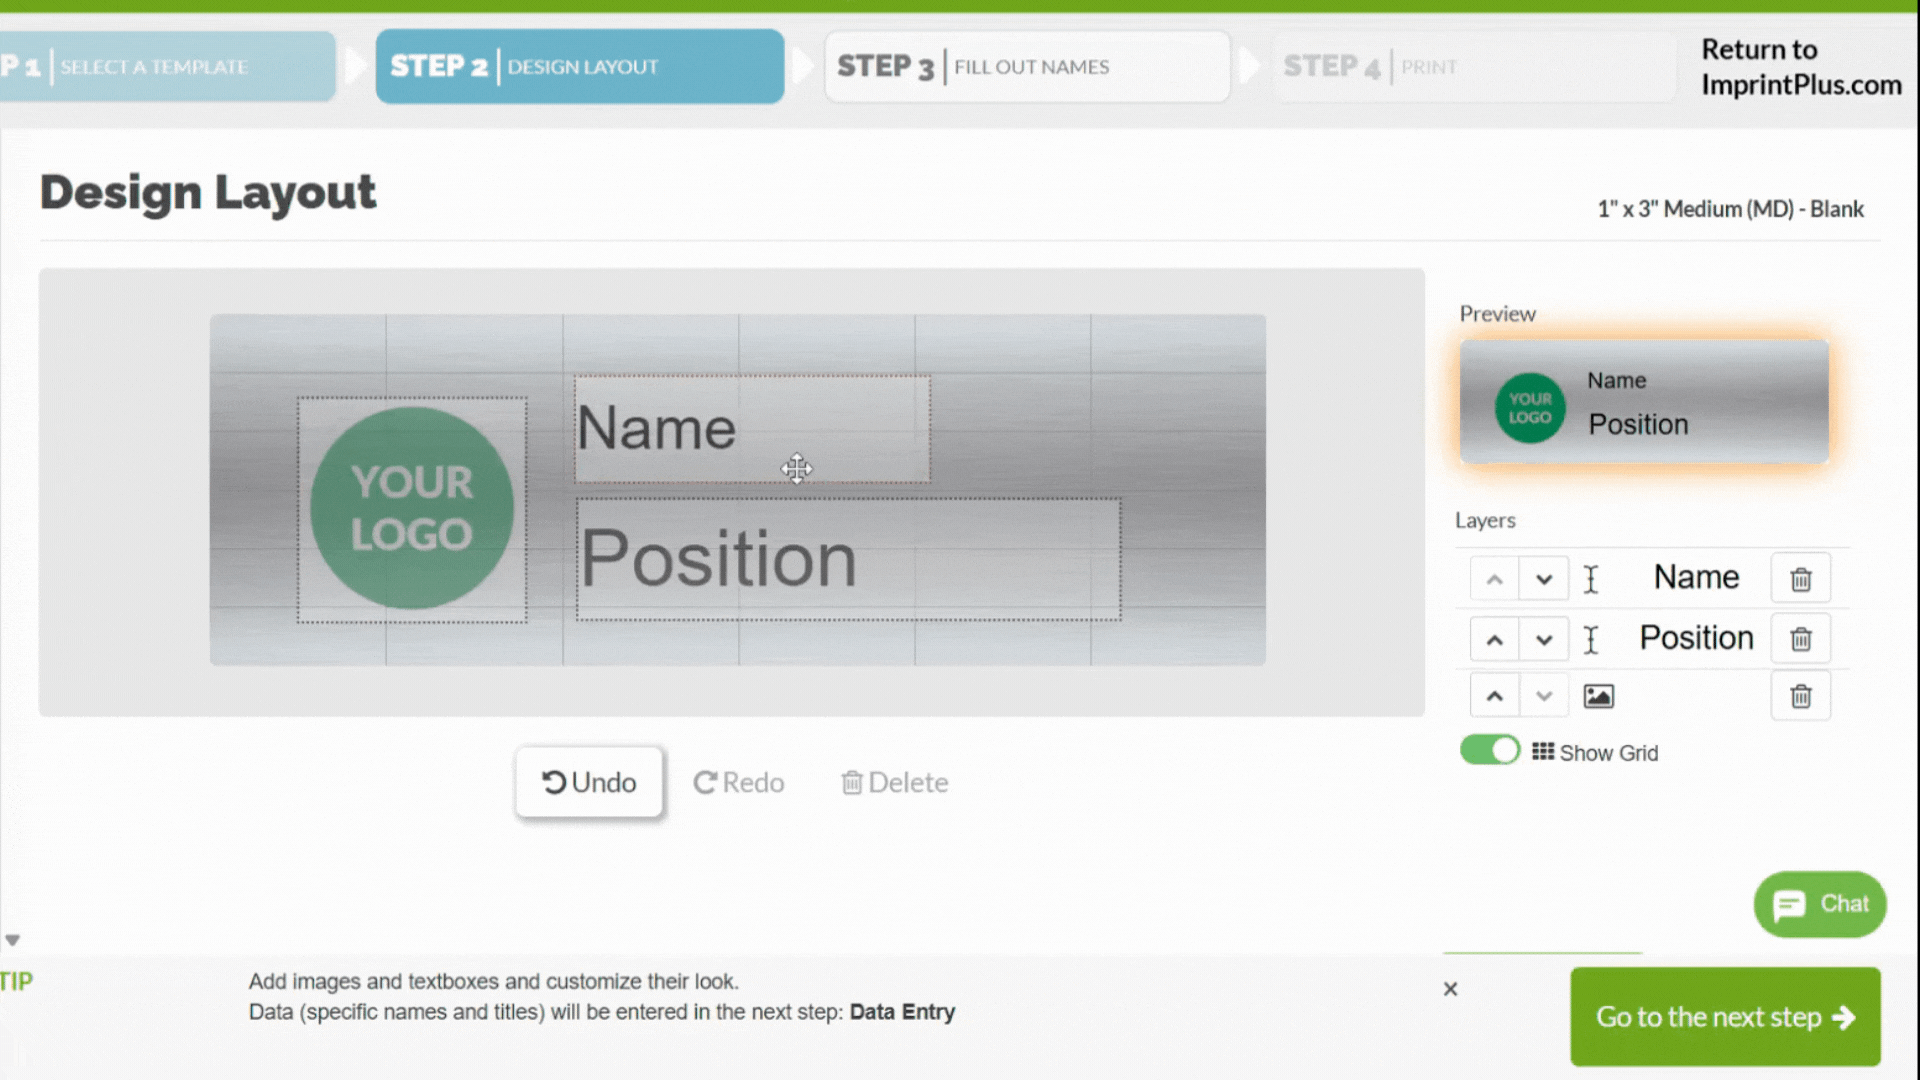
Helpful tips:
- The textbox ID is just a label, like “Name” or “Title.”
- Click an element to tweak fonts, alignment, and size.
- Click “Advanced” for more settings like spacing and rotation.
- Use the layers panel to reorder or delete elements.
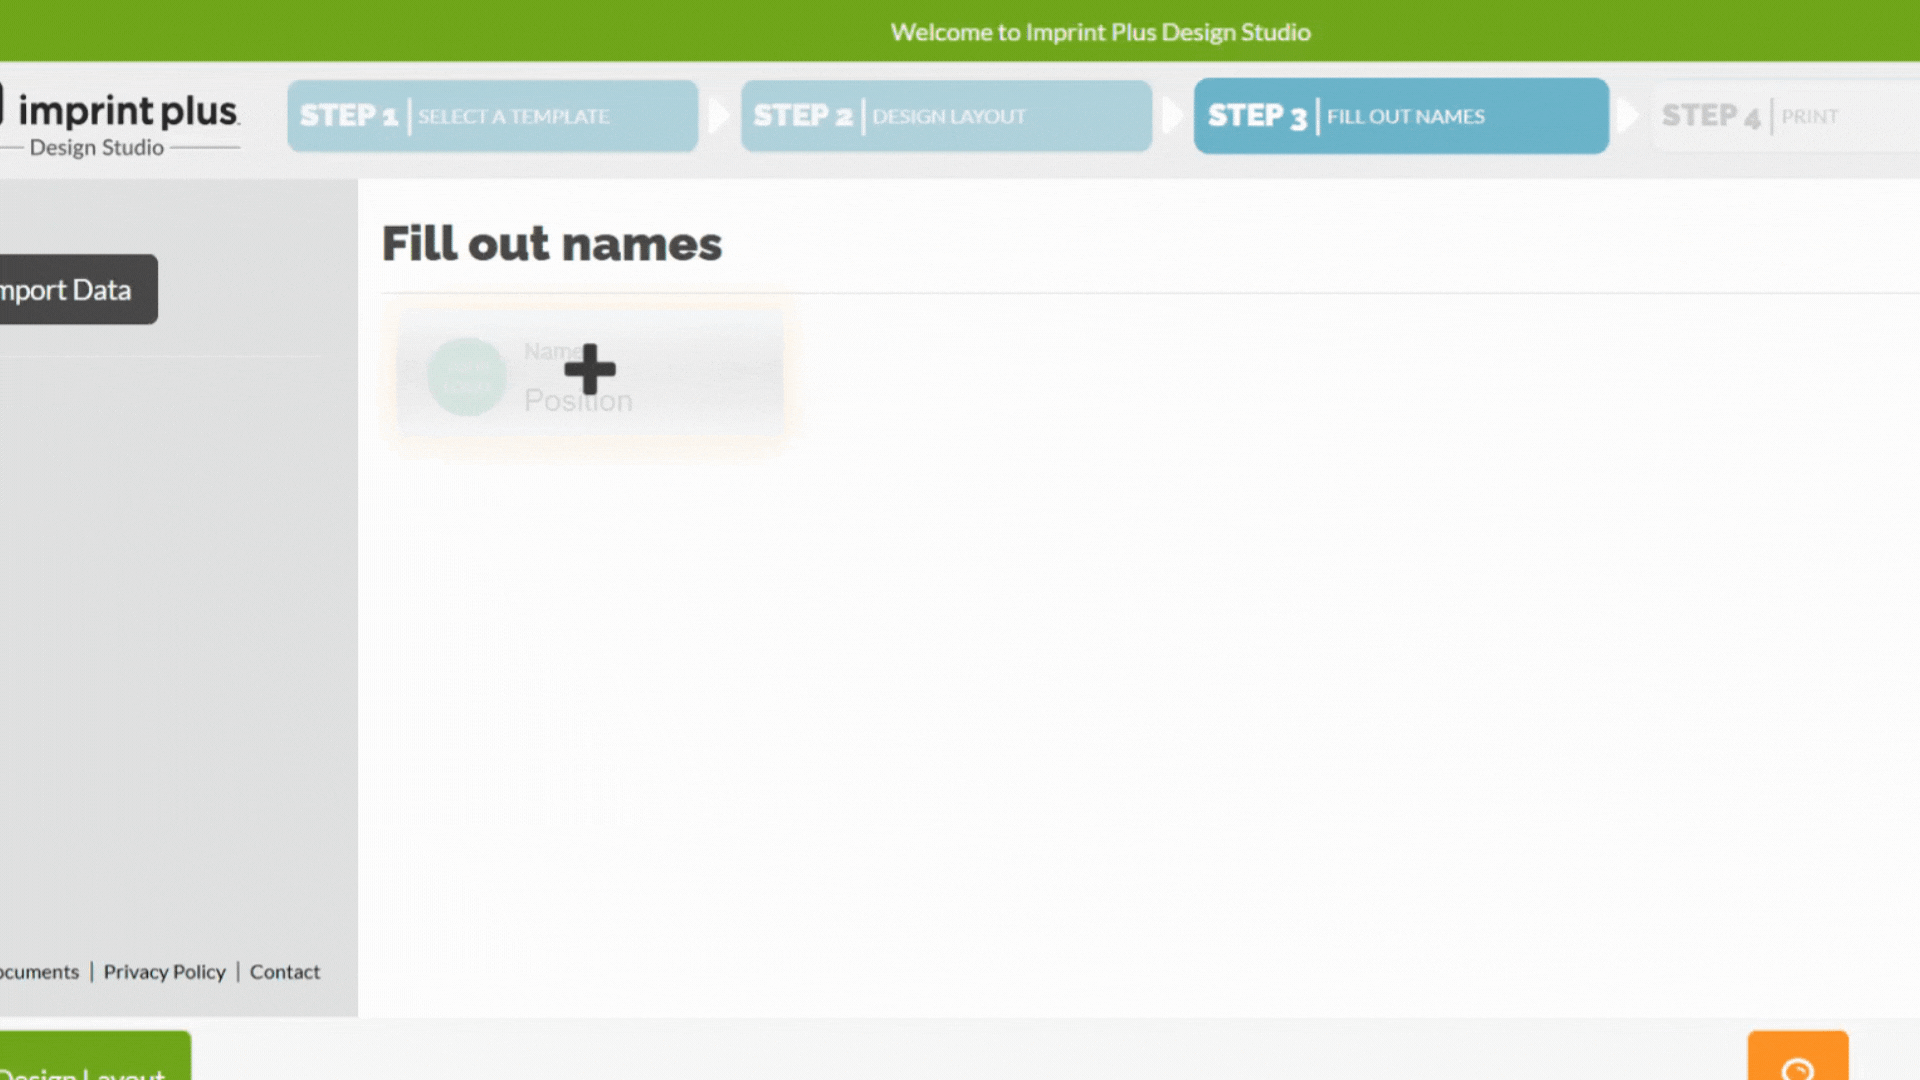
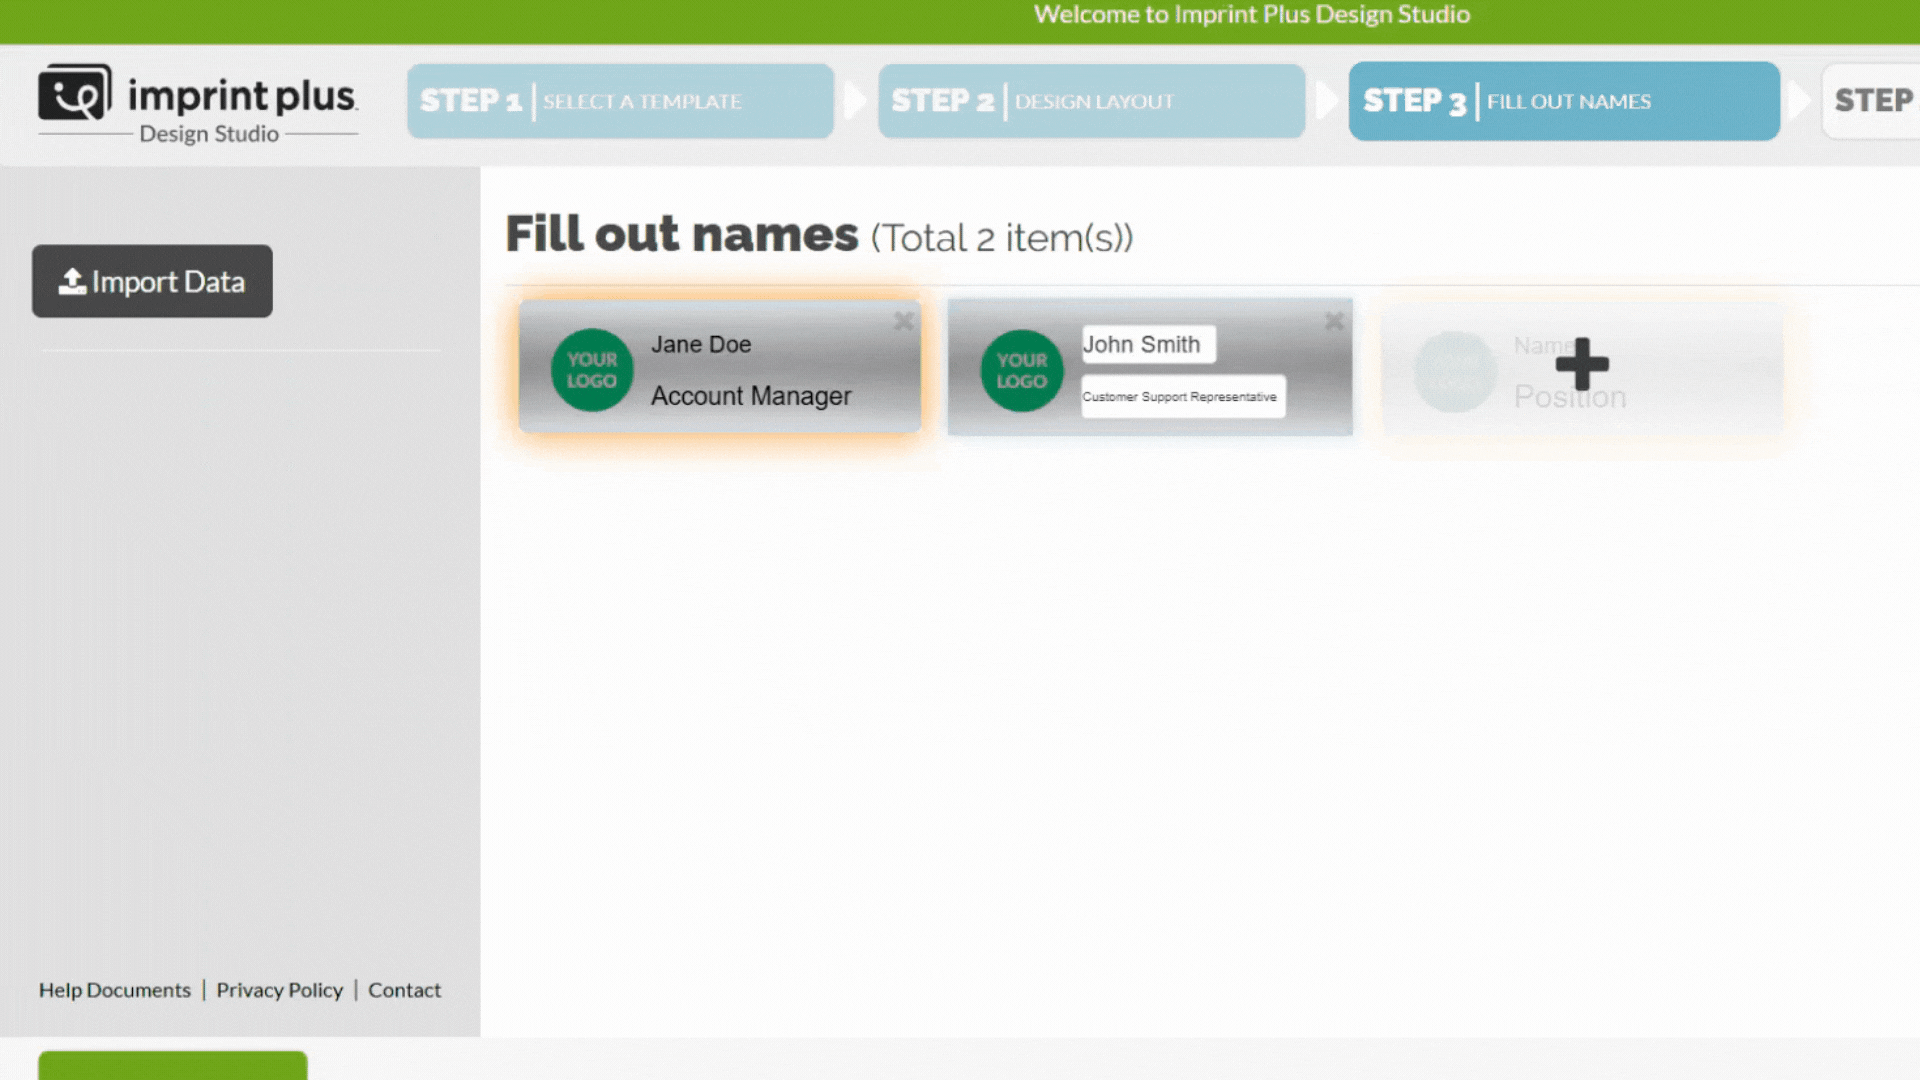
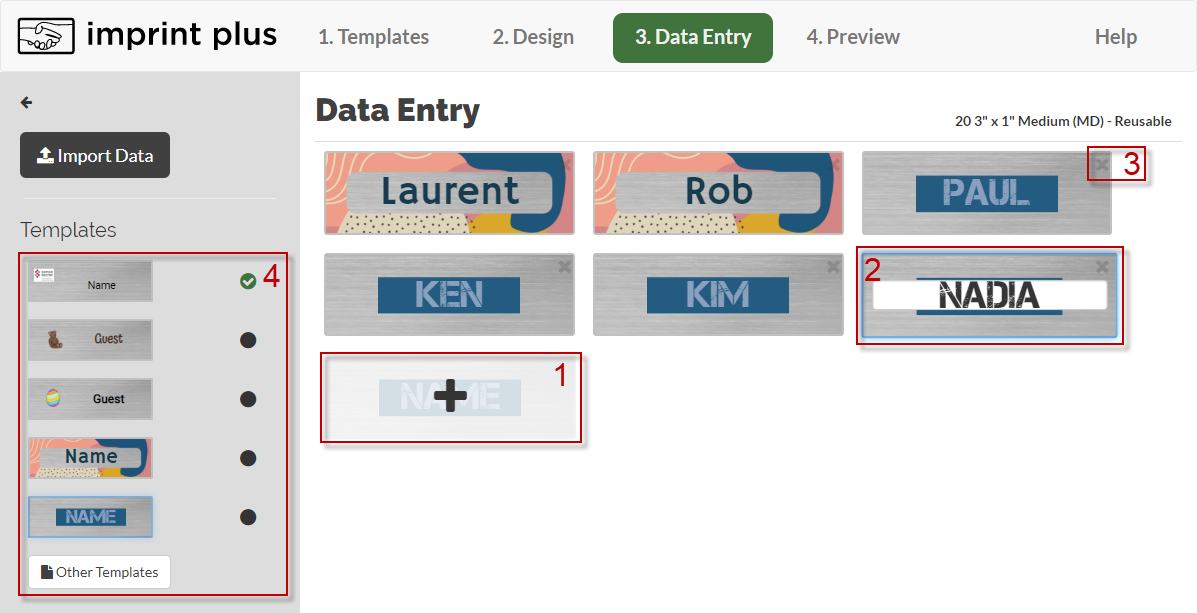
STEP 3: Add Names and Titles
Now you’re adding real info to your badge.
Option 1: Type it in manually
1. Type each name or title in the text boxes.
2. Use the + button to add more entries.
Option 2: Upload a spreadsheet
1. Click Import Data and upload your .csv or .xlsx file.
2. Click Select to map each column to the correct textbox.
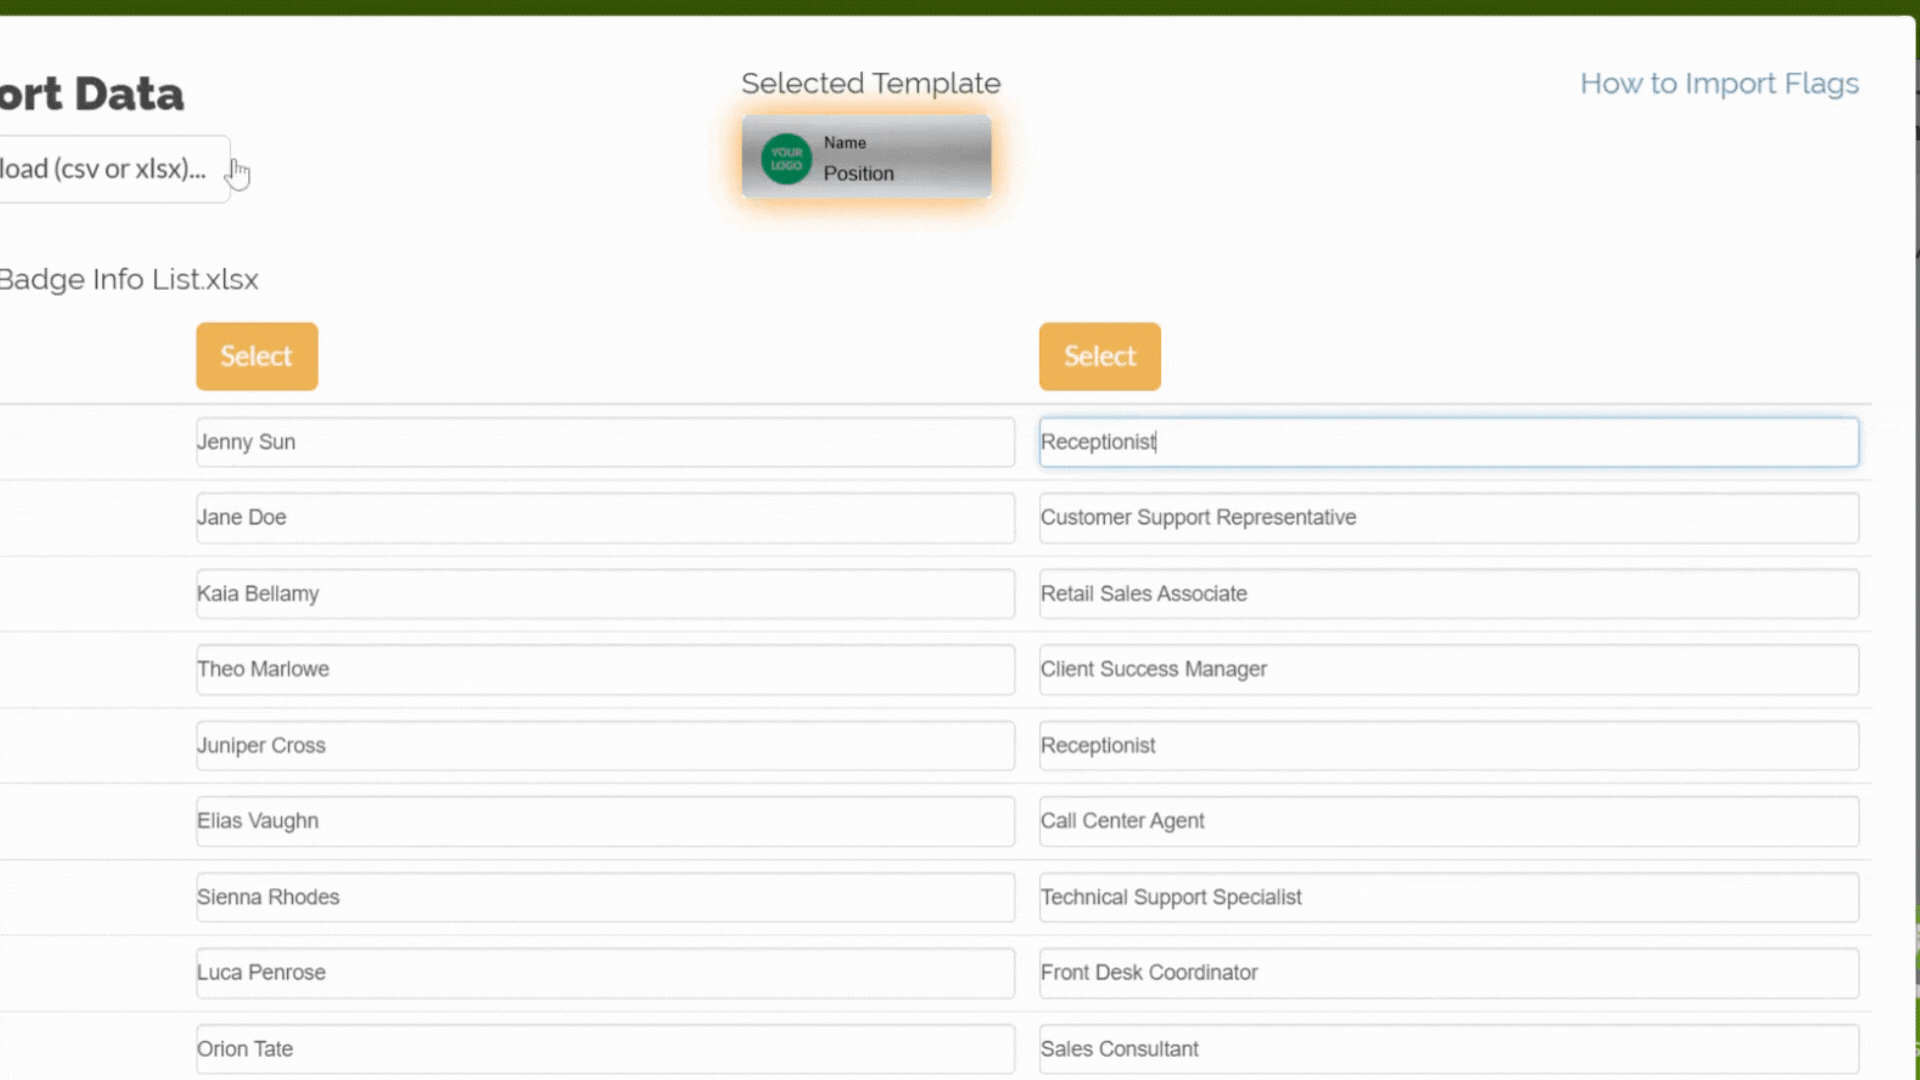
3. Uncheck any rows you don’t want to print.
4. Scroll down and click Import when done.
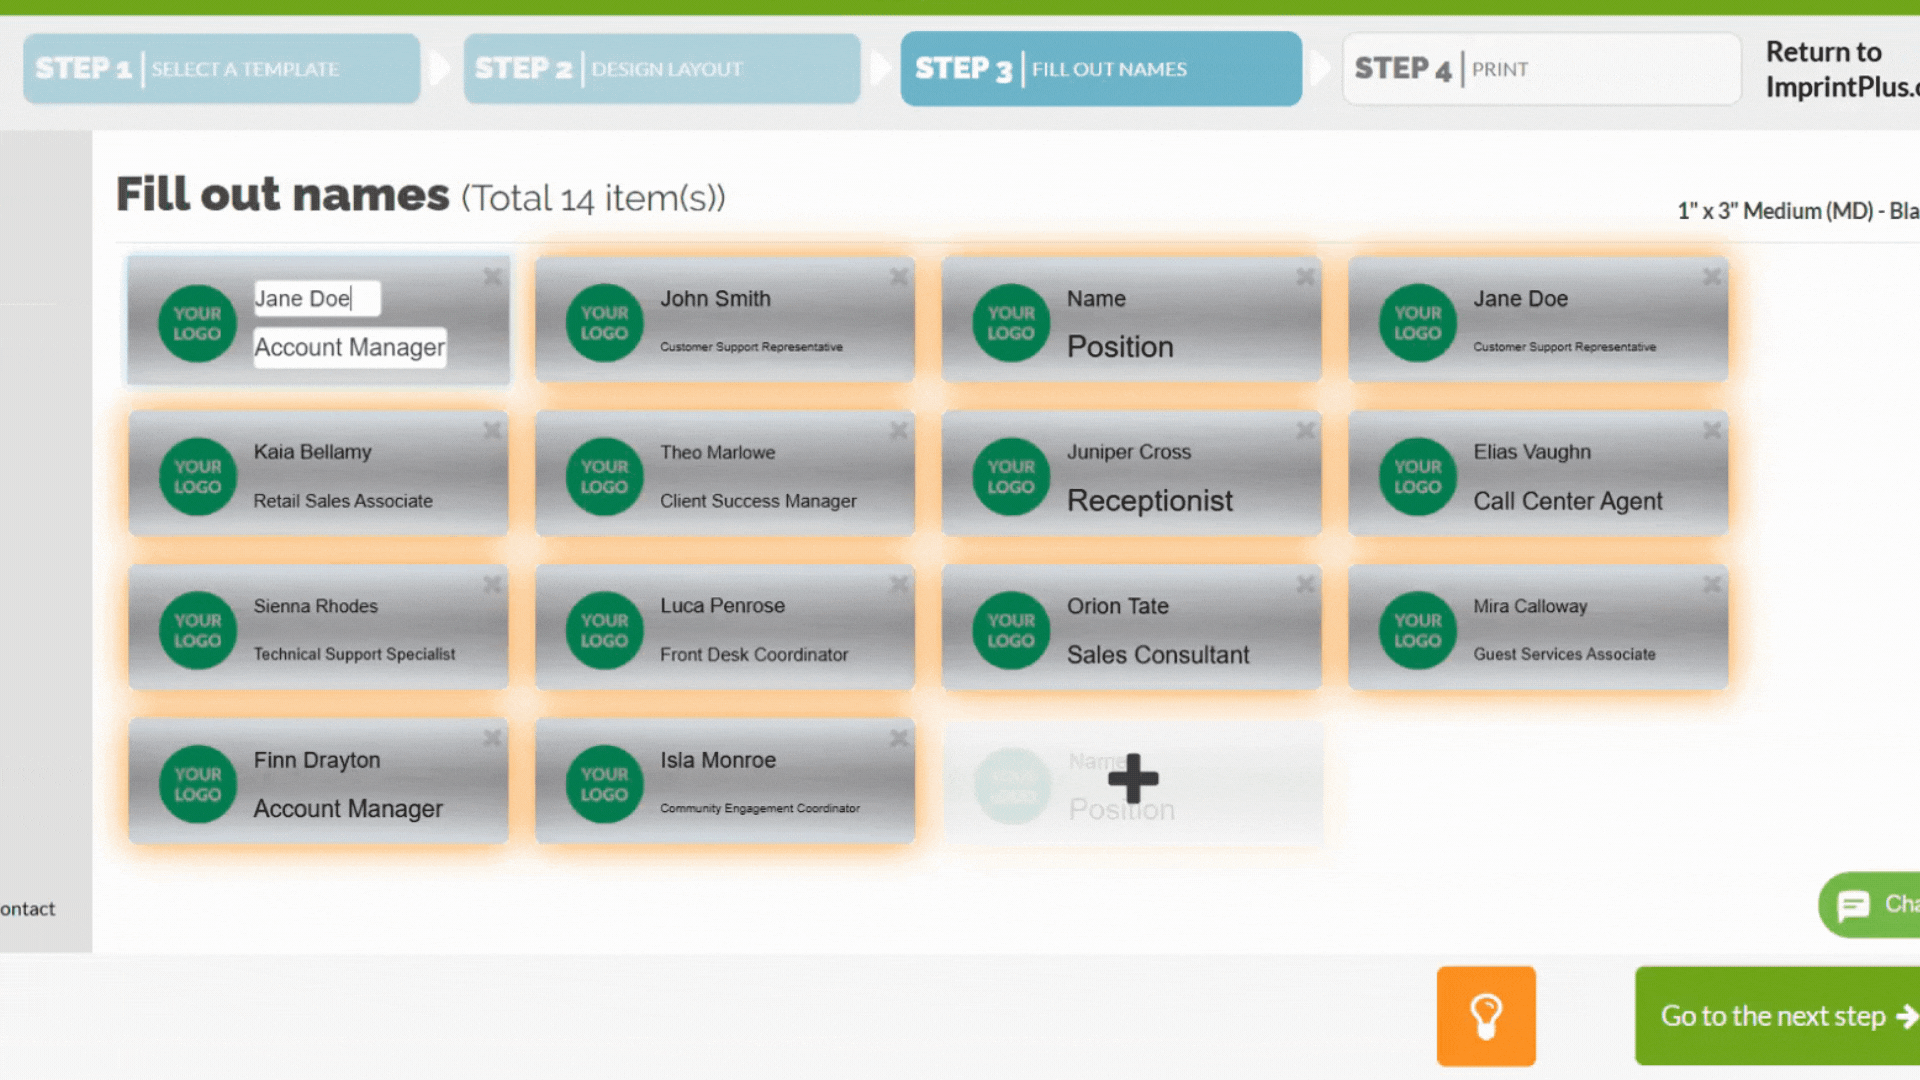
Before moving on:
- Double check the total number of badges.
- Edit or delete any entries as needed.
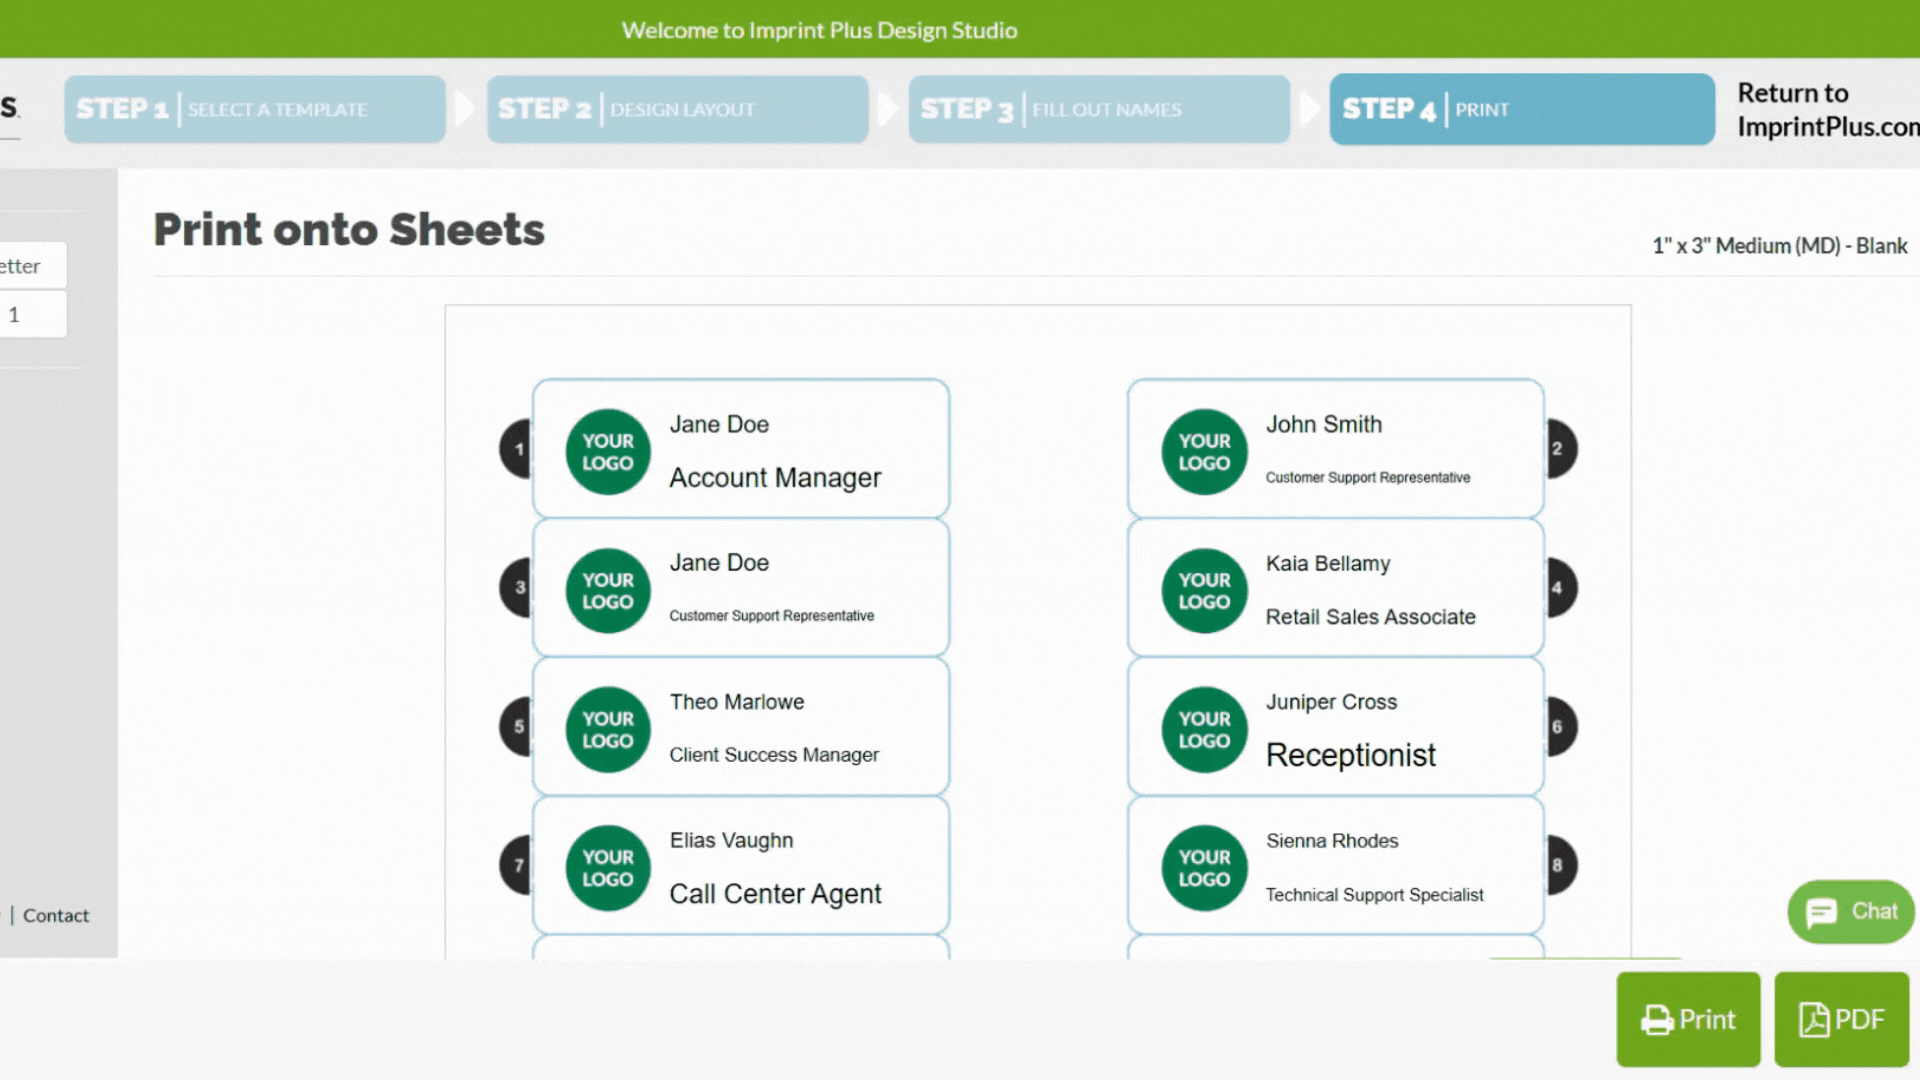
STEP 4: Get Ready to Print
Time to preview your work and print.
Things to check:
1. Pick the correct paper size (usually Letter).
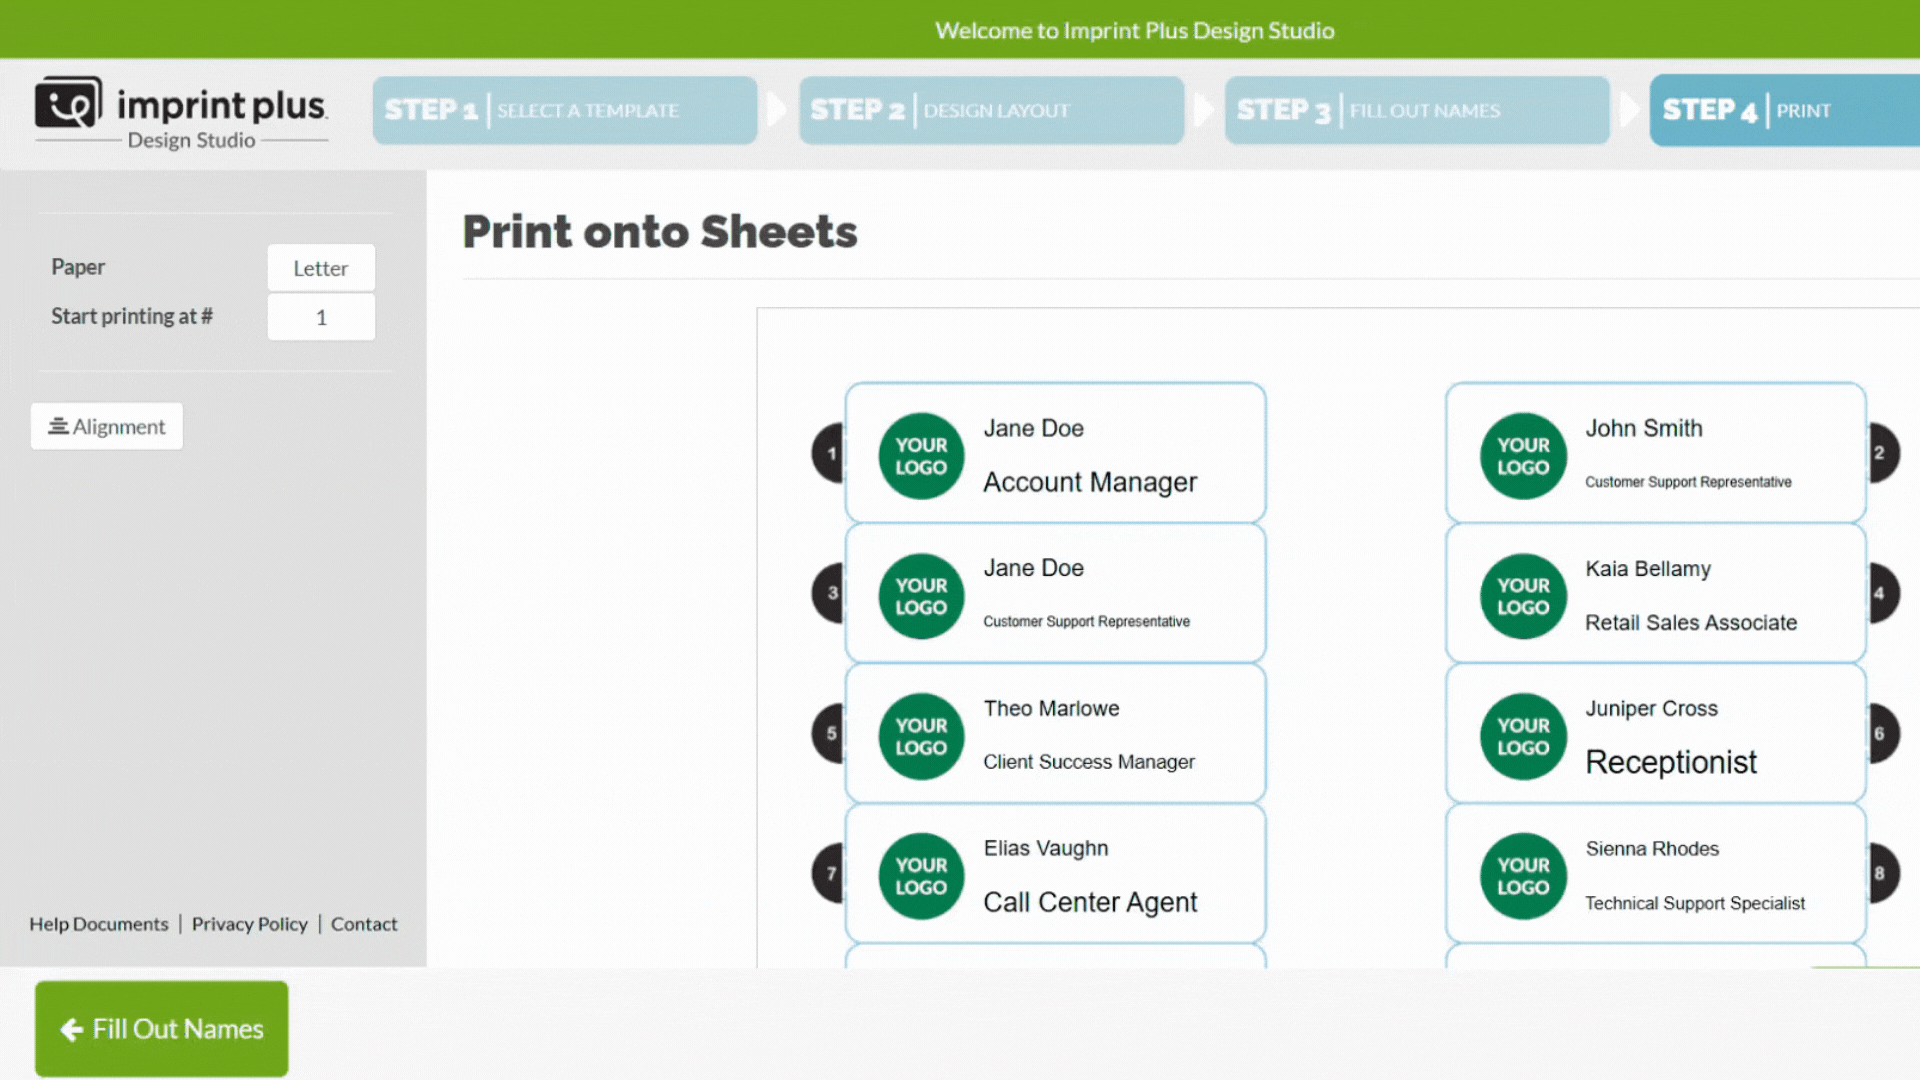
2. Choose the right starting position if you’re reusing a sheet.
Printing Tips:
- Always do a test print.
- Make sure your printer settings are set to Actual Size or Scale 100% (don’t pick "Fit to Page").
- If your text looks misaligned after printing, click Alignment to make adjustments. Use the sliders to shift the text up, down, left, or right, then click Save.
- Print settings may look a bit different depending on which browser you're using.
- You can also save your work as a PDF.
Need Help?
Click the Chat button or reach out to our support team anytime.
- Email: customerservice@imprintplus.com
- Phone: 1-800-563-2464
We hope this guide makes it easier to design awesome name badges. Have fun creating!
Related Articles:
Can't Find What You're Looking for?
We'll help you find an answer or connect you with Customer Support through form submission, email, or phone.


Design
Textbox
1. Add
Click the "textbox" button in the left menu to add it to your badge.
2. Position
To position, your textbox, use the "align" button in the left menu and choose from the pre-set placements. You can also use your mouse to drag the textbox in place.
3. Size
Adjust the size of your text from the left menu.
4. Properties
From the left menu, adjust your font type and text spacing.
5. Advanced
Advanced properties are also available.
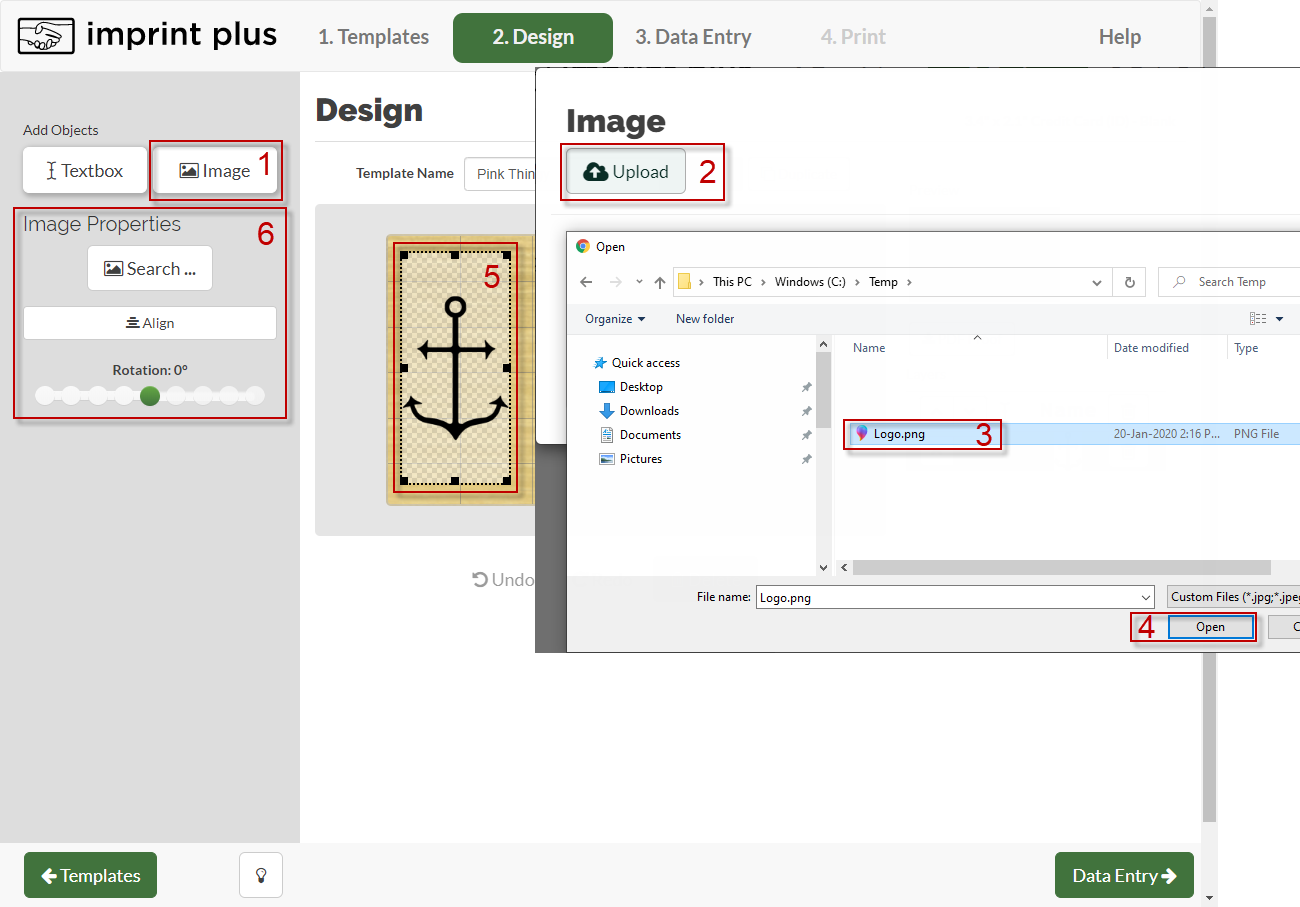
Image
1. Add
Click the ‘image’ button in the left menu to add one to your badge.
2. Upload
Click the ‘upload’ button and select an image of your choice. The maximum file size is 2MB.
3. Select
Click on your image.
4. Open
Open image.
5. Position & Size
To position, your image, use the ‘align’ button in the left menu and choose from the pre-set placements. Or, use your mouse to drag your image in place. You can also adjust the angle of your image by sliding the ‘rotation’ button in the left menu.
6. Properties
Rotate the image or set the aspect ratio behavior.

Data Entry
1. Add
Click on the ‘+’ symbol to add as many badges as you like.
2.Edit
Type your desired text directly into each badge.
3. Delete
If you want to delete a template, simply click on the ‘x’ that appears in the top corner of
4. You can add as many different templates as you like. To add a template you’ve used before, click on ‘other templates’ and make your selection. If you want to add a new template that you’ve never used before, click on the ‘template’ button in the top menu and repeat your textbox and image selections. Then, return to the data entry page and enter your text into each new template.
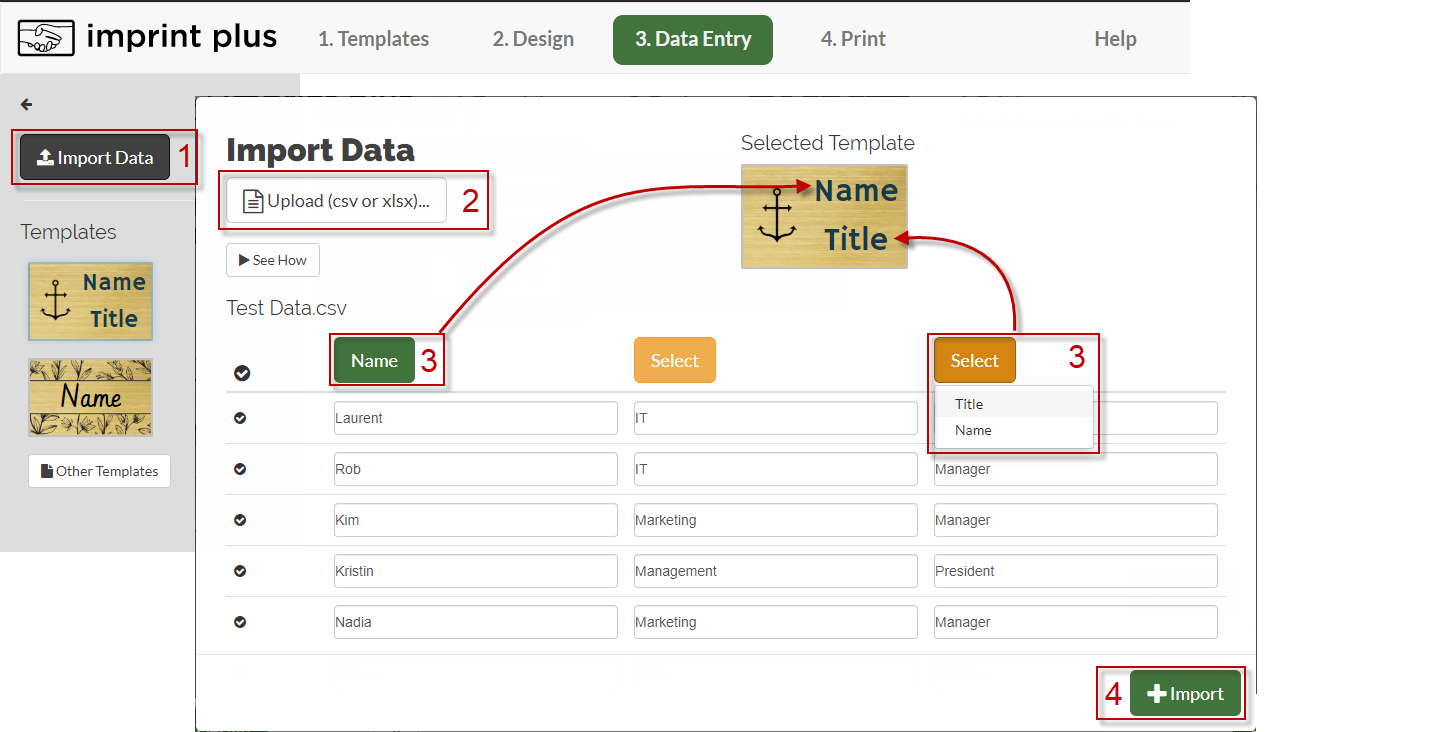
Import Data
1. Import Data
From the data entry page, click on the ‘Import Data’ button in the left menu.
2. Upload
Upload an Excel or CSV file containing your chosen data (specific names and titles).
3. Associate
Associate the columns of the imported data with the textboxes of the template.
4. Import
Select the names you wish to import by clicking the check symbol on the left side of each name. Then, click the import button.
1. Add
Click the ‘image’ button in the left menu to add one to your badge.
2. Upload
Click the ‘upload’ button and select an image of your choice. The maximum file size is 2MB.
3. Select
Click on your image.
4. Open
Open image
5. Position and size
To position your image, use the ‘align’ button in the left menu and choose from the pre-set placements. Or, use your mouse to drag your image in place. You can also adjust the angle of your image by sliding the ‘rotation’ button in the left menu.
6. Properties
Rotate the image or set the aspect ratio behaviour.
Shifting Badges
Each badge prints slightly more off than the previous badge
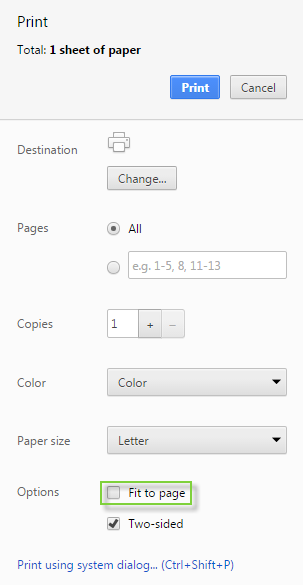
1. Chrome
Google Chrome Print Dialog - Uncheck "Fit to Page"
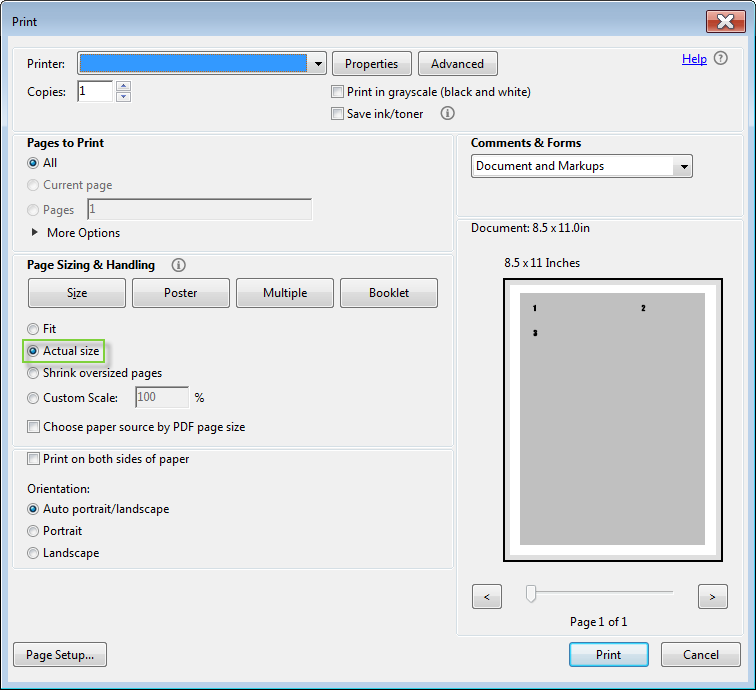
2. Adobe Acrobat
Adobe Acrobat Print Dialog - Select "Actual Size"
Print Quality Issue
1. Check Printer
Does the printer match the sheet?

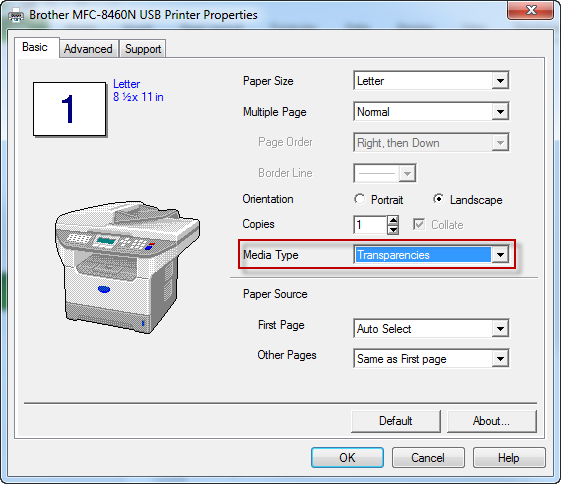
2. Brother
Transparency settings example on a Brother printer
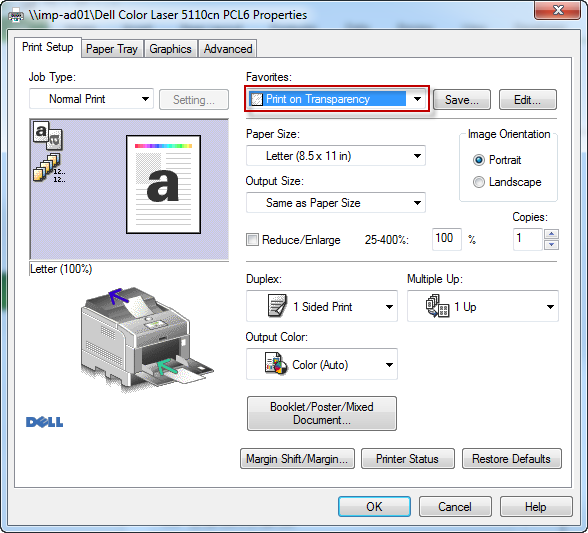
3. Dell
Transparency settings example on a Dell printer
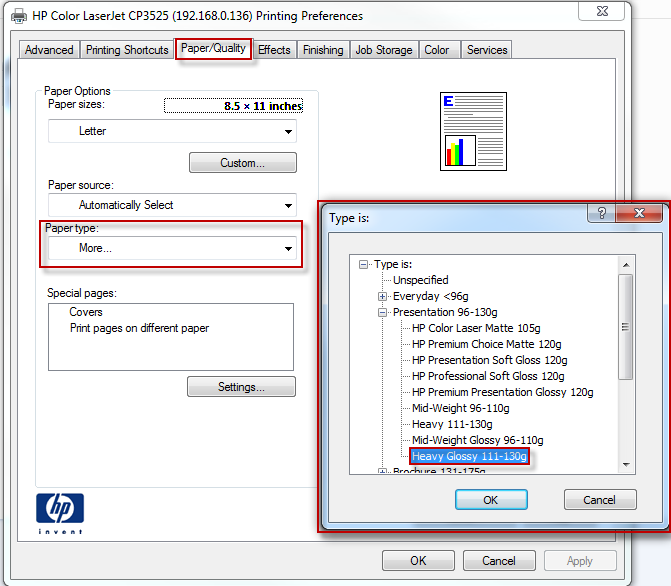
4. HP
Transparency settings example on an HP printer
5. Normal Paper
Does it print normally on a white piece of paper? If the color smudges or the ink runs on a white piece of paper, your printer will need maintenance.
The print results are not aligned
1. Looking good, I'm ready to print
2. Oops, this print looks way off
3. Go into "Alignment" and reflect how it printed on your sheet
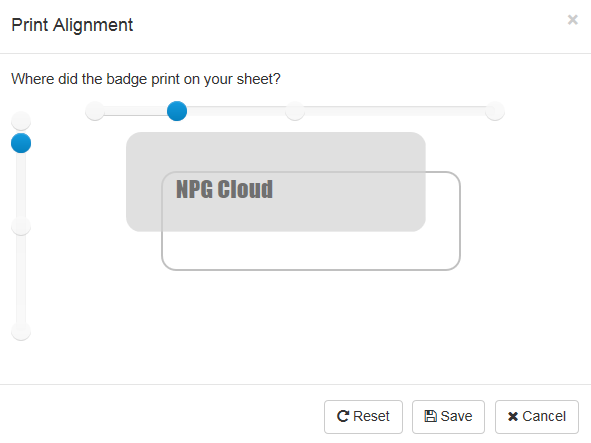
4. Print alignment issue is solved!

Email US

Call US

Contact Form